
How to Create and Publish a Chrome Extension in 20 minutes
Ever wondered what it would be like to create a Chrome extension? I’m here to tell you it’s easy!
Follow these steps and to turn your idea into reality. You’ll be publishing a real extension in the Chrome Web Store in no time.
What is a Chrome Extension?
Chrome extensions let you add functionality to the Chrome web browser without diving deeply into its native code. That’s awesome because you can create new extensions for Chrome with core technologies that web developers are very familiar with — HTML, CSS, and JavaScript. If you’ve ever built a web page, you’ll be able to create an extension faster than you can have lunch. The only thing you need to learn is how to add some functionality to Chrome through some of the JavaScript APIs that Chrome exposes.
If you’re not yet experienced building web pages, I recommend you first dive into some free resources to learn how to code, like freeCodeCamp.
What Do You Want to Build?
Before you start, you should have a rough idea of what you want to build. It doesn’t need to be a groundbreaking new idea, you can just do it for fun. In this article, I’m going to tell you about my idea and how I implemented itm making a Chrome extension.
The Plan
I’ve been using the Unsplash Chrome extension for a while. It allows me to have nice background images from Unsplash in my default tab. I later replaced it with the Muzli Chrome extension that turns the default tab into a feed of design news and shots from around the web.
Let’s use these two extensions as inspiration to build something new — this time for movie lovers. My idea is to show a random background image of a movie every time you open a new tab. On scrolling, it turns into a nice feed of popular movies and TV shows. Let’s get started.
Step 1: Setting Things Up
The first step is to create a manifest file, manifest.json. This is a metadata file in JSON format that contains properties like your extension’s name, description, version number, and so on. In this file, we tell Chrome what the extension is going to do, and what permissions it requires.
For the movie extension, we need permission to control activeTab, so our manifest.json file looks something like this:
{
 "manifest\_version": 2,
 "name": "Cool name",
 "description": "Super cool extension",
 "version": "1",
 "author": "Your name", "browser\_action": {
   "default\_icon": "tab-icon.png",
   "default\_title": "Have a good day"
 }, "chrome\_url\_overrides" : {
  "newtab": "newtab.html"
 }, "permissions": \["activeTab"\]
}
As you can see, newtab.html is the HTML file that should be rendered every time a new tab gets opened. To do this we need permission to control the activeTab, so when a user tries to install the extension they’re warned about all the permissions the extension needs.
Another interesting thing inside the manifest.json are the browser actions. In this example, we use it to set the title, but there are other options as well. For instance, to show a popup whenever you click on the app icon inside the address bar, all you have to do is something like this:
"browser\_action": {
  "default\_popup": "popup.html",
 },
Now, popup.html will be rendered inside the popup window that's created in response to a user's click on the browser action. It's a standard HTML file, so it’s giving you free rein over what the popup displays. Just put some of your magic inside a file named popup.html.
Step 2: Test Whether It Works
The next step is to create the newtab.html file and put in a "Hello world”:
<!doctype html>
<html>
  <head>
    <title>Test</title>
  </head>
  <body>
    <h1>Hello World!</h1>
  </body>
</html>
To test it, visit chrome://extensions in your browser and ensure that the “Developer mode” checkbox in the top right-hand corner is checked.

Chrome Developer mode
Click “Load unpacked extension” and select the directory in which your extension files live. If the extension is valid, it will be active straight away, so you can open a new tab to see your “Hello world.”
Step 3: Making Things Nice
Now we have our first feature working, it’s time to make it look nice. We can style our new tab simply by creating a main.css file in our extension directory and loading it in our newtab.html file. The same goes when including a JavaScript file for any active functionality that you want to include. Assuming that you’ve created a web page before, you can now use your magic to show your users whatever you want.
Finishing the plan
All I further needed to finish the movie extension was HTML, CSS, and JavaScript, so I don’t think it’s relevant to dive deep into the code, but I’d like to go through it quickly.
Here’s what I did. For my idea, I needed some nice background images, so, in the JavaScript file, I used the TMDb API to fetch some popular movies, took their backdrop images, and put them in an array. Now, whenever the page loads it randomly picks one image from that array and sets it as the background of the page. To make this page a little more interesting I also added the current date in the top right corner. And for more information, it allows users to click the background, which links to the movie’s IMDb page.
I replaced the screen with a nice feed of popular movies when the user tries to scroll down. I used the same API to build cards of movies with an image, title, rating, and vote count. On clicking one of those cards, it shows the overview with a button to watch a trailer.
The result
Now, with that little manifest.json file and just some HTML, CSS and JavaScript, every new tab that you open looks a lot more interesting:

View the end result here.
Step 4: Publish Your Extension
When your first Chrome extension looks nice and works as it should, it’s time to publish it to the Chrome Store.
Simply follow this link to go to your Chrome Web Store dashboard (you’ll be asked to sign in to your Google account if you aren’t already). Then click the “Add new item” button, accept the terms, and you’ll go to the page where you can upload your extension. Compress the folder that contains your project and upload that ZIP file.

Chrome Web Store
After successfully uploading your file, you’ll see a form where you should add some information about your extension. You can add an icon, a detailed description, upload some screenshots, and so on.
Make sure you provide some nice images to show off your project. The store can use these images to promote your groundbreaking project. The more images you provide, the more prominently your extension will be featured. You can preview how your extension looks inside the web store by clicking the “Preview changes” button. When you’re happy with the result, hit “Publish changes” and that’s it, you’re done!
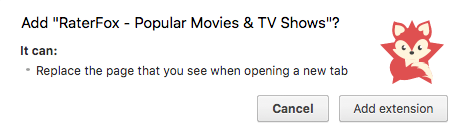
Go to the Chrome Web Store and search for your extension by its title (it might take some time before it’s up there). If you’re interested, you can find mine here.
The only thing left to do is get some users. So, share a post about your life-changing Chrome extension on social media, tell your friends to check it out, add it to ProductHunt, and don’t forget to share your project here in the comments — I can’t wait to see what you came up with!
Conclusion
As a web developer, it’s easy to quickly create a Chrome extension. All you need is some HTML, CSS, JavaScript, and basic knowledge of how to add functionality through some of the JavaScript APIs that Chrome exposes. Your initial setup can be published inside the Chrome Web Store within 20 minutes. Building an extension that’s new, worthwhile, or looks nice will take a bit more time. But it’s all up to you!
Use your creativity to come up with something interesting and if you ever get stuck, the excellent Chrome extension documentation can probably help you out.
What are you waiting for? Time to start working on your own Chrome extension and turning your idea into reality.
Don’t forget to share your project in the comments and any questions or feedback.